Tag Archives: Knitting

Amazing Shawl

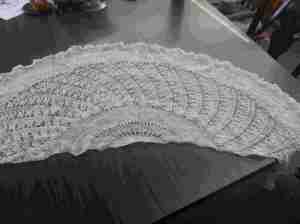
I while back while at Anoka Fiber Works I met a gal who had purchased some white roving my shop space there.  She had spun the roving on a supported spindle and it was lovely.  I think the fiber was from my alpaca Carley.  The goal was to knit a shawl from the yarn.

shawl

Before blocking

And before I knew it, this spinner/knitter had finished a lovely shawl and sent me pictures of it.

shawl being blocked

Being blocked

Beautiful.

shawl after blocking

After blocking

Lovely.

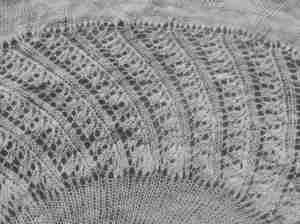
close up of lace

Close up

Lace detail.

shawl being worn

Being worn

And looks great on!  An especially amazing project to complete by spinning on a spindle and knitting!  So proud to have contributed just a little!

I’m down with Downton!

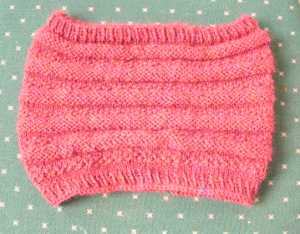
I finished the F~S4 (Finally Season 4) Downton Abbey Cowl that I started just a short time ago.

cowl

Snood style

It took nearly all of 2 balls (50 g each) of Baby Twist yarn.  Knit on size 9 needle, it was a quick and fun project.

textured cowl

F~S4 Cowl

It has a lot of texture from repeats of 4 rows each of purl, knit and seed stitch.  And the alpaca yarn gives it wonderful drape that is so soft against the skin.

cowl

Downton Abbey Cowl

This is destined to be a ‘shop sample’ at Anoka Fiber Works where I have the Baby Twist yarn for sale.  Stop by and check it out.  I may have to knit another it was so easy and fast.

Something for Sis

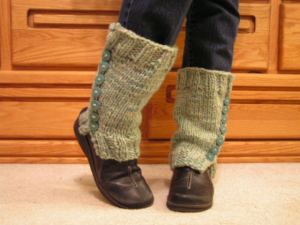
Nearly a year ago, I hand knit a pair of spats for my sister.   I used my 100% alpaca bulky yarn that I had dyed.  They turned out really cute, but each required 7 buttons!  So they just hung around here until the end of last month when I took a polymer clay button class. 

Spats

Spats heading right

I mixed the clay with the help of the instructor and managed to match the color quite nicely. 

spats

Spats going left

I made the buttons, baked them and sewed them on.

spats

Spats posing

I think they look great, but I’m concerned that the bulky yarn is too heavy and they will not stay up if worn over slippery leggings or over skin.

spats

Spats showing off

For now, the jury is out.  They have been delivered to my sister, but it is now too warm to wear jeans and boots.  In the meantime, I’ve begun to work on a boot cuff pattern to make on a knitting machine.  There will be more on that in the future!

Every girl deserves a new outfit!

Don’t you agree?  Every girl should have a very special outfit.  Here’s the one I just finished.  It is 100% alpaca yarn, hand dyed and hand knit! 

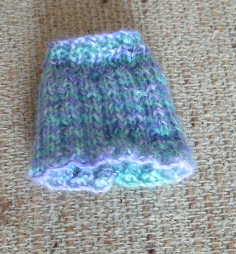
skirt

The skirt

The skirt has mock pleats.

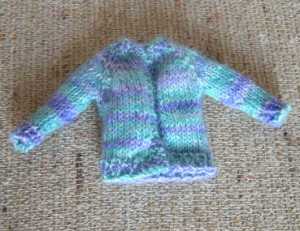
sweater

The sweater

The cardigan sweater still needs snaps on the front.  The skirt also needs snaps. 

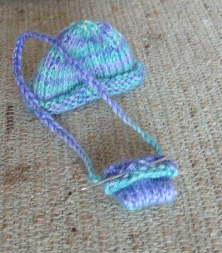
hat and bag

Hat and bag

And a matching hat and hand bag are a requirement.  The purse also needs a wee snap closure.   And,,,,,  taa  daa!!!

matching outfit

Competed outfit

That’s right.  Even Barbie needs a little pampering in an outfit of alpaca!  What fun it was to knit.

Delivery of the special hat

The hat is delivered.

hat

A great fit

 The journey of making this hat is complete.  It is now on the job, keeping my brother-in-law’s head warm.  Like a prayer shawl, this hat carries my blessings for the one who wears it!  May he wear it for many years!

Step 5 of my special project

All the previous steps of this special hat project have led to this — knitting!  First, I knit a little swatch.

swatch

My sample swatch

By measuring this and doing some math, I conclude I will need 88 stitches for the hat. 

stretched swatch

Can you see the difference?

I knit a few test rows, then change to a smaller needle.  When the stitches are stretched out, you can see that the last rows (at the top of the photo) are a little tighter.  This will make a warmer hat, so I choose that needle size. 

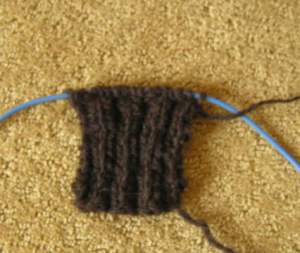
beginning of a hat

And so I begin

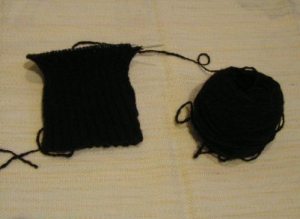
I cast on and start a 2×2 rib in the round.   My plan is to continue this rib to the end.

more hat is done

And so it grows

Black is so hard to photograph, but it is still ribbing as I continue to knit round and round.

finished hat

The hat is a foot!

The hat looks quite strange when done.   Really long and skinny!  It is nearly a foot long. 

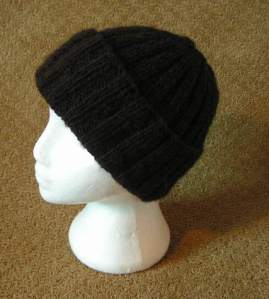
hat on a styro head

Ah, that is more like it!

The 2×2 rib is so stretchy that is easily stretches to fit my styro head with plenty length to fold up for double warmth over the ears.  It is so soft and immediately warms the wearer!

I’m very excited to turn this over to the one who needs it.  I hope he likes it.

Back to dyeing!

I’ve been waiting for the chance to do some dyeing with the new colors I got a while back and the white yarn I had processed at Rach-Al-Paca’s mill. 

Step 1:  Skein up a whole lot of yarn:

yarn skeins

Skeins to be dyed

Step 2:  Hang the wet yarn to drip until dyeing is done:
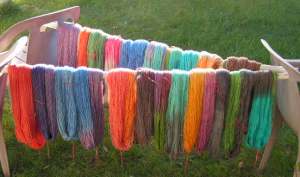
hanging yarn

Wet yarn

Even though it was rather windy, I managed to keep my dye-pots hot and the colors appeared like magic!

Step 3: After washing, rinsing and rinsing again with a little vinegar, the water is spun from the yarn in the wash machine and the yarn is hung to dry:

drying yarn

Side one

My little drying rack is loaded.

hanging yarn

Side two

 Both sides are full.

hanging yarn

And more

 And this pipe is holding more skeins.
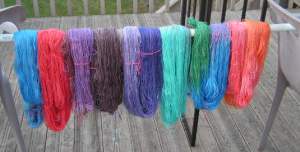
hanging yarn

The last of the yarn

 The yarn on this pipe is the odd amounts for custom projects or to be knit into products.

Step 4:  After the yarn is dry, I re-skein it to make it look better:

skeins

Which is better?

Each pair of skeins above is the same color.  The one on the left has been re-wound into a neat skein with the multiple colors blended as they will look when knit into a project. I think they look better.  Do you?

skeins

Here’s half

 I have 28 new skeins of yarn for sale.  Those who visit during Farm Tour will have the first chance at this yarn! 
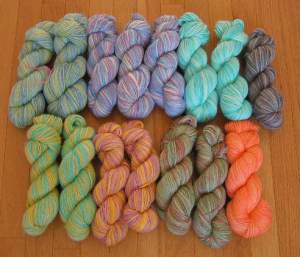
skeins

And the rest of the yarn

I have 2 and 3 of some of the color combos.  I even have a couple in camo and blaze for the knitters with hunters in their lives! 

I hope to see you all at Farm Tour – Sept 29 -30 – at our farm.

Next up – for me!

Now that my topper is finished and I have been wearing it, I was looking for another project to make for me.  This is what I decided on:

scarf patter

My next project

The pattern calls for mohair, but I have some super fine (about 16 micron) alpaca yarn that is between lace and fingering weight.  It is so yummy.  So I started this loop scarf.

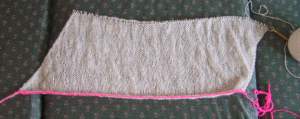
beginning of scarf

So far...

The pink at the beginning is a provisional cast on.  When finished with the knitting, I’ll pickup the stitches from the pink and kitchener beginning to end to make a loop scarf with no visible seam. 

edge of scarf

Close up

It is stockinette stitch, but on every knit row, I increase at the beginning and decrease at the end.  This is a brilliant way to keep the stockinette from curling on the edges.  While it grows pretty quickly because of the large needles, it is still going to be a long term project.  There will be many hours of knitting to be done here!  Think I can finish by the chilling nights of fall?

Committed

Remember the topper I started in January?  I’ve been making slow progress on it since.  I have the back and both sides of the front done.   Then I started the sleeves.   They are 3/4 length sleeves that start at the bottom and have increases spaced evenly to the top.  The row stitch pattern is a repeat of 4 stitches, so as I was working on the sleeve when I had increased 4 stitches on each side I added a new pattern to the edges.  I had finished 43 rows of the 60+ that I needed when I decided I didn’t like the jagged, zig-zaggy look of the sleeve.  So I tore it out – after much gnashing of teeth and pulling of hair.  I wasn’t sure I would like NOT adding the pattern to the edges any better.  I wish I had taken a picture, but I didn’t.

And I started again.  This time I have not increased the stitch pattern, doing a plain stockinette on the edges of the new stitches.

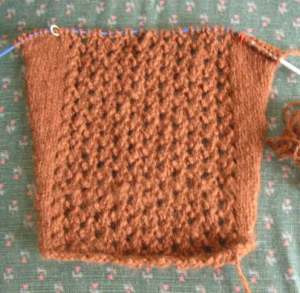
hand knit sleeve

First sleeve

I’ve nearly finished this sleeve.  I have about 6 more rows to go which will include one more set of increases and get me very close to the goal of 13 inches. What do think?  Can you imagine what it looked like with another set of the pattern added in the edges?  I did not like that look, but struggled with not following the pattern. (I’m just that way, I guess!)  But at about row 40, I decided I like this look and am sticking to it! 

And that brings me to this:

sleeve and yarn

The end!

Yep, that is the end of my big bobbin of hand spun yarn.  It will come close to finishing this sleeve, but I have 2 arms.   And it is a good thing I do as I will have to go back to the wheel and see if I can match the thickness and spin enough yarn to knit another sleeve and do a crochet border. 

I think I’ve overcome my frustration with this and the excitement to see it finished has returned.

Progress report

As promised, here is the progress report on the topper I started.  (The pattern calls it a ‘topper’.  I don’t really care for that name.  What would you call it?)

sweater back

The back

This is the back.  It will grow to be about 20 inches from bottom edge to top.  I’m guessing I accomplished about 8 – 9 yesterday – I didn’t measure.  What I did measure was across. 

measuring width

Check my gauge!

Look at that!  It is supposed to be 18 inches across the back piece.  It is less than a half inch over that!  Gauge has always been my nemesis.  I’m quite pleased with myself.  It will be hard to focus on knitting for business all week as I could just keep going on this.  But I must and so I will.