Tag Archives: felting kits

The Packing Challenge

I’ve been staging things to go to Shepherd’s Harvest for the last couple weeks.  But yesterday, I had to get serious and try to fit it all into our car. 

tote bins

Product

I have 5 tote bins – the clear one in front is just yarn! The others have hats, mittens, socks, shawls and lots of other alpaca goodies for sale. The box in back has my rugs and place mats/stadium seats.  

fleeces

Fleeces

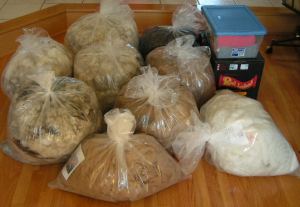
I have 7 fleeces and 2 bags of roving, a box of felting kits, and a small tote bin of wrist warmers.

racks

Display racks

 I’m also bringing my garment rack and my yarn rack.  Fortunately, these come apart.  By last night, all this was stuffed into the car!  With the front passenger seat reserved for my suitcase, backpack, knitting project bag and one rack I forgot about yesterday. 

Thanks to Twisted Suri Alpaca Ranch for bringing the grid-wall and tables for both our booths! 

Baby news – nothing yet, but my husband could experience his first alpaca birth without me this weekend.

The making of a felting kit – part 2

Here is the remainder of what I need to do to complete the felting kits with the new alpaca design.   The design needs to be put on the backing.

alpaca design

Design in red

The first step is to trace the design on the back of the paper with a special transfer pencil.  Tracing on the back is especially important if you have lettering, as the design will be reversed when ironed on the destination fabric.  Place the paper with the red tracing side down on the backing and press with a hot iron.

design on fabric

Alpaca design

The backing we use is an alpaca/wool quilt batting which I cut into the proper sized squares.  The pencil will create a couple copies before I need to retrace the picture again.  It did take a bit of practice to get the heat setting that would do the transfer without scorching the batting under the paper.

Next I go to the computer. 

felting kit paperwork

All the paperwork

I insert the photo of the completed design into the template for the front and back of the kit.  I also print a copy of the instructions for each kit.

foam block with needles

Block and needles

Two felting needles are inserted into the side of the foam block to keep them from poking anything or getting broken.

assembly line for felting kits

All lined up

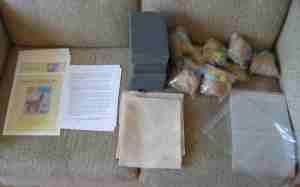
Then I create the assembly line:  Front page, back page, instruction sheet, foam block with needles, printed backing, bag of pre-measured fiber and the perfect size zipper bag to hold everything.

completed kit

Ready to go

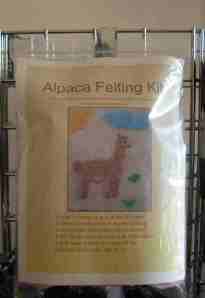
I punch a hole in the top and the kit is ready to be hung up for sale.  I will have these as well as our three other designs at Shepherd’s Choice.  I’ll be doing a needle felting demonstration there on Saturday, April 14 during the Yarn Shop Hop.  Stop by, watch the demo, grab a kit and make a cute little picture.  All you need to add is a picture frame.  I’ll soon be listing the new kits online for those who are not local.

The making of a felting kit – part 1

The consensus was to go with the fawn alpaca fiber for the felting kit.  I think it will work the best.   The way to show definition is by needle felting an indention where a line would be drawn – for instance to separate the tail from the body.  These indented areas show up best in lighter colors.  

And so the process of creating the kit began.

washing fiber

Into the suds


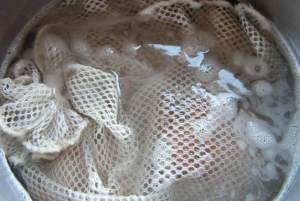
The fawn for the alpaca will be the natural color of our alpaca Annie M.  I washed a bag of her fiber.  After three washes, a rinse and a spin, it was ready to be dried.

fiber drying

Wet fiber

I spread it out on the drying rack with a sheet under it and a ceiling fan over it to blow it gently dry.   Then I went to dyeing pot.

yellow fiber

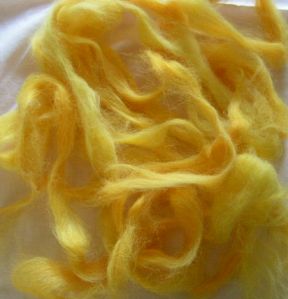
Bright as the sun

I dyed some white roving from Araucano into this yellow/orange for the sun.

blue fiber

Fluffy blue clouds

I tied some little bundles of roving and dyed them blue.  The ties kept the dye from penetrating evenly, so there will be fluffy blue clouds.

green fiber

Green as grass

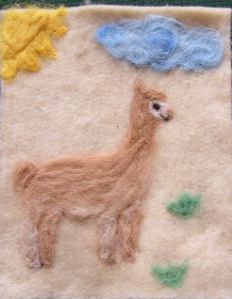
A wee of green is needed for a few tufts of grass.  Once the fiber was all dry, I was able to needle felt the picture.

felted picture

Pretty as a picture

A photo of the completed picture will be used for the packaging of the kit, so I get to create each design.

bags of fiber

Bags of fiber

This is an overhead view of the little bags of fiber that will go in each kit. But there is still more to do before the kits are ready for sale.  Come back for Part 2!


Sneak Peak

I’ve started working on the next design for an alpaca felting kit.  I’ll be doing a needle felting demonstration at Shepherd’s Choice on Saturday, April 14 during the Minnesota Yarn Shop Hop.   I thought I should have the newest design ready to show off. 

partially completed felted alpaca

What color?

The design was drawn by local artist Kristin of Delightful Day Boutique.  I’m trying to choose the color of fiber for the alpaca.  It is difficult to see the definition created by felting more in certain areas when using dark colors.  I’m leaning towards the fawn.  What color do you think this little alpaca should be dressed in?

Felt, felting, felted

I have been a felting fool of late! 

felted soap

Completed!

These 67 bars of felted soap went to meet their maker!  Their soap-maker, that is.  The folks from All Things Herbal picked these up.  I still have 46 bars here, 8 of which I felted today.

Below is the before shot.

mittens

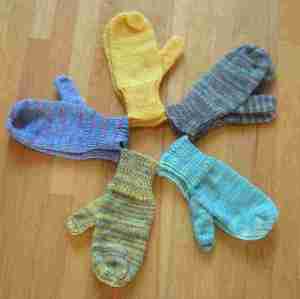
Knitted

I knit these 5 pair of mittens.  If you count the boards in the flooring, you can see they are about one board width smaller below. 

mittens

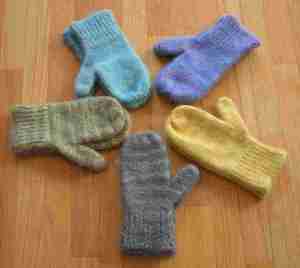
Felted

And then I felted them.  So warm and cozy. 

felt balls

In the works

Above are soon-to-be cat toys.  They are currently just puffed up felted blobs of alpaca fiber drying on a rack.  But I’ll stuff with cat nip and sew the hole shut and some lucky kitty will get them for Christmas!

Wow!  Three felting projects, three different felting methods.  There is no end to the ways to use the wonderful alpaca fiber!

The latest felting kit

The last couple weeks, I’ve been working on creating a new felting kit.  I chose a cute little bunny in a flower pot from the designs selected by my partners at Twisted Suri Alpacas.  After dyeing and stamping and all that, I got to needle felt the design.  This is the fun part!  And I am ‘required’ to do every design so I have an example to take the pictures for the packaging.  😉

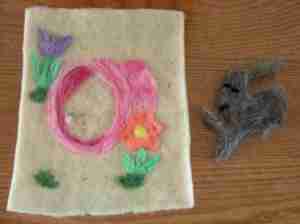
Bunny #1

I asked for opinions and 3 out of 3 (4 of 4 if I include my own opinion!) were not thrilled with the bunny’s color.  So…..

Bunny #1 removed

I had carded white and black fiber together for the gray and thought I had a really nice gray roving!  I’m considering attempting to combine a bunch more and even try spinning it.  Gray yarn is so popular, but gray alpacas are rare.  (It is a bonus when good still comes out of an experiment gone awry!)  But a gray bunny was not to be.  So I tried again.

Bunny #2

This is the finished picture!   Already in our Etsy shop.   Cute and fun to make.

A new way to dye

I’m starting a new alpaca felting kit  design and have started dyeing roving in the new colors needed for this design.  I decided to try acid dyeing in aluminum pans heated over water in my big roaster. 

After soaking the roving in soapy water for about a half hour, I put it in the tins over a couple inches of water in the roaster.   I added the citric acid directly to the dye, which I mixed up in a little glass jar and sucked up in a big syringe.  I squirted the dye onto the roving and squished it around with chopsticks.  I added a little more water as needed to get better coverage.   Then I cranked up the heat and let it cook!

Cooking over the roaster pan

Cooking over the roaster pan

I have an ounce each of 2 shades of what I was hoping to be a rusty red roving.  In the smaller pan I have 1 ounce of roving divided into 2 shades of green.

Since the roving is not directly in contact with the hot roaster pan, I could use higher heat.   The roving got more steamed than boiled. 

This is the result.

New colors of roving

New colors of roving

The purple was done in a dye pot on the stove.  The 2 reds are more red than the brick color I wanted and I didn’t get solid coverage of the color.   Neither of these really matter for the felting design.  That is why I chose this project for my experimentation.  The green also has some lighter areas that didn’t get much dye, but grass and leaves can be that way!   Now I know – I need a little more liquid to get the dye to reach all the roving in the tin pans.   The citric acid in the dye makes the dye stick to where it is squirted faster than when in a big pot of water.  Good lessons to learn.

I’ve a few more colors to dye before I can felt the new design, but I’m hoping to to get it done this week!

More yarn dyeing

I must praise Dharma Trading.   I bought my dyes from them.  When faced with the question of forgetting the citric acid, I emailed them.  Within hours, I got a reply.   They suggested I wash the yarn in the hottest tap water and detergent.  If the dye stays, it is good!  So I washed and the dye stayed.  

Ready to go

Ready to go

The skeins re-wound to properly mix the colors.

On Saturday, I dyed this. 

My favorite colors

My favorite colors

It is the last of my imported 100% alpaca bulky yarn.  My goal is to dye all my imported yarn before I get my Wisconsin grown yarn back from Rach-Al-Paca.   I have a cone (about 2 pounds) of 80% alpaca / 20% silk lace weight and over a cone of 100% alpaca sport weight to dye!   I got some dyeing tips from the Wool Princess  and I’ll be trying these out soon and sharing the results with you.

I’ll be consigning my yarn and a few finished items at a new shop – Art Reflections near here.  I’m very excited to see how my things will do there.  And Delightful Day Boutique has had requests for yarn.  So I’ll be bringing in some yarn to join the felting kits  already there.

December what??

That’s what I keep thinking every time I look at a calendar.  I can’t believe Christmas is nearly here.  I’m not at all ready!  No gifts bought, no cards or letter ready to send out, no decorations.   It’s not that I don’t want to do all those things, but I really would rather knit and weave and spin!  And so I have been.  

I’ve got hats nearly done for a brother and sister – custom ordered by their mom.  The young girl chose her style and colors – light green and violet.  I think I may steal the combo and try dyeing some yarn in those colors.  The son’s hat is blue and gray.  I hope to finish both week.

I also have a shawl on the loom – again, to be finished this week and mailed in time for Christmas.   It is coming along nicely.   I have yarn dyed for a pair of gray men’s mittens – to be picked up on Saturday! 

Can I do it?  I think so.  Darryl has plans tonight after work – which includes someone else feeding him!  (Yay – no cooking!)  And tomorrow he will come home for supper and then head off to a meeting. 

I also want to tell you about a new boutique in town.  Delightful Day Boutique  just opened in Becker.  If you are ever in the area, you need to check it out.  Local artists and  crafters have things for sale there, as well as gently used kids and maternity clothes.  New things are still being added.  Get a sneak peak on the website.  You can find our felting kits  there and I’m proud to have them there.  It is always nice to  have new place to shop and support the local folks. 

And a confession – I have nearly killed my desktop computer.  It has so much STUFF on it, that it can barely move!  The worst is my pictures.  But that is also where I have the software that I use to crop and compress my images, so for at a while, I’ll try blogging from my laptop and not including many pictures.   My New Year’s Resolution is to remove the bad photos (fuzzy, repeats, etc) and then move some to another storage place.    So hang in there – I’m taking the pictures and will get them on some day! 

December what?  16th?  No way!  I gotta get a move on!

Another design is ready

Our second alpaca felting kit is now available in our Etsy shop.  It is a cute bear on a hot air balloon ride.

Go for a ride

Go for a ride

If you are close and would like to stop by either Hollyhock Farm or Twisted Suri Ranch, we have the kits available and ON SALE!  The kits are $15 (regular price is $20).   The refill kits are available too – on sale for $10 (regular price is $15).

I’m going to make you bit longer for the funny story – it deserves a post of its own.  Just a hint – Honie is the star!